How To Fix A New Custom Gaming PC? [Fast & Easy Guide]
In this article, we will let you know How To Fix A New Custom Gaming PC? So, you can enjoy smooth gaming. Building a custom gaming PC may be fun, but it can also be frustrating to have problems after the build.
We will help you with common causes and provide simple solutions to make your new gaming computer work well. Whether you have boot problems, hardware compatibility, or software bugs, fixing them may seem difficult.
How To Fix A New Custom Gaming PC?
Building a new custom gaming PC can be both fun and difficult. Problems like not starting, overheating, or suddenly shutting down can be a pain in the neck. We will show you simple steps you can do to fix and solve issues with your new custom gaming PC.
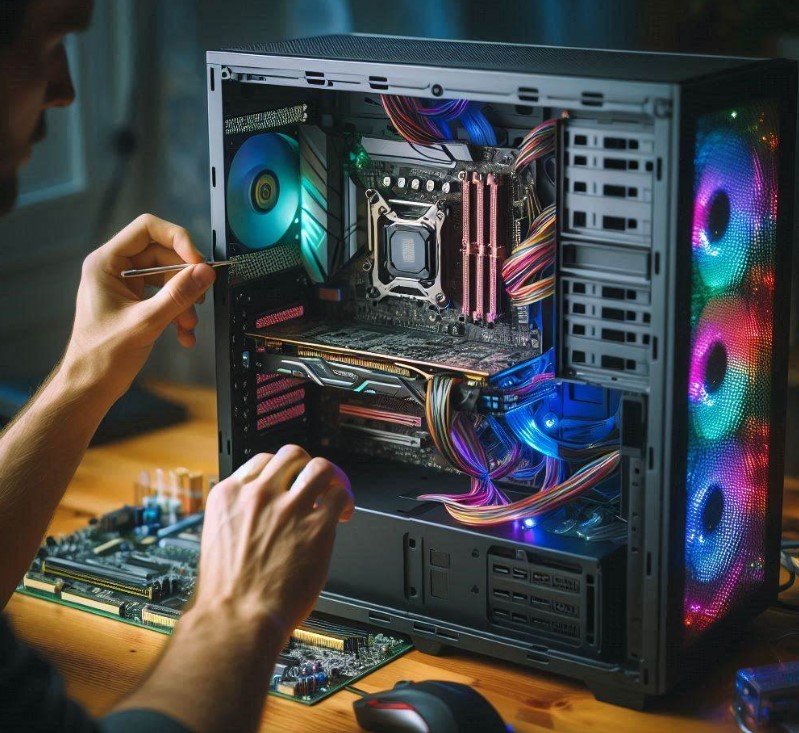
Check all connections
All cables must be plugged in tightly. Double-check the power supply, motherboard, GPU, and storage connections because sometimes a loose cable may not turn on or boot the PC properly.
Hardware Installation Check
Ensure that the parts like CPU, GPU, RAM, and storage devices are properly fitted into their slots. Often just disconnecting and reseating all these components fixes bad contacts.
Check the Power Supply
Ensure your power supply is strong because a weak one can cause random shutdowns or problems when booting up.
Updating the BIOS
When your computer doesn’t realize you have new hardware, need to upgrade the BIOS. Refer to your motherboard manual to learn how to do this.
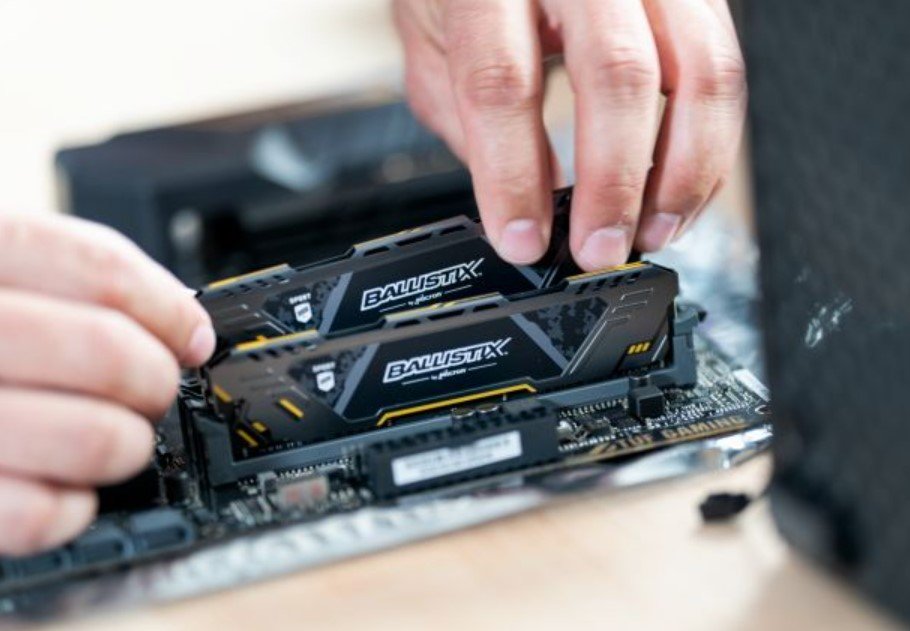
Perform a memory test
Malfunctioning RAM can cause these problems, from failure to even boot your computer. Run a test on your RAM for errors using MemTest86.
Beware of overheating
Ensure that all cooling systems are running from CPU fans to case fans. System instability or even shutdowns can be created by overheating.
Testing with a Few Parts
To isolate that problem, try booting your PC with only the essential components: CPU, one stick of RAM, and, if needed, GPU. This tests whether the parts are bad or not.
Reinstall the Operating System
If it is a software problem, sometimes reinstalling the operating system will erase whatever corruption or damage is causing your PC.
If you follow the steps above you should be able to find and repair any common faults with your new custom gaming pc with relative ease. Be very patient and careful while checking everything. Make sure all the parts are in the right place and functioning.
Causes For New Custom Gaming PC That Won’t Boot
There are many reasons why a new custom gaming PC won’t boot. Reaching from a basic power connection problem to something much more severe, such as a hardware failure.
You completely work your way through the possibilities, and finally, you find the problem and fix it and your gaming rig is back online. Here are a few reasons why your system may not be booting:
- Improper Power Connections: Make sure all power connectors are seated properly, including the 24-pin motherboard connector, the 8-pin CPU power connector, and the GPU power connectors.
- Incorrectly Installed Components: So reseat the CPU, RAM, and GPU to ensure they are seated correctly.
- Incompatible or Faulty RAM: Try using one stick of RAM and test for compatibility with the motherboard.
- BIOS Issues: Make sure to update your BIOS to the latest version to ensure compatibility with all your components.
- CPU Installation Problems: Make sure the CPU is seated correctly, and look for bent CPU pins or misalignment.
- Motherboard Standoffs: Ensure standoffs are correctly placed to avoid short circuits.
- Faulty or Incompatible PSU: Check that the power supply is suitable and working properly for the system.
- Short Circuits: In the case (pun intended) of any loose screws or wires that might short something out.
- Incorrect Front Panel Connections: Be sure to line up the front panel connectors (power and reset buttons) with their opposite spots on the motherboard.
- Faulty Components: Test each part separately to identify any defective hardware.
How Do I Fix A New Custom Gaming PC That Won’t Boot?
If your new custom gaming PC won’t boot, it can be a frustrating experience, but there are several steps you can take to troubleshoot and fix the issue.

- Verify Power Connections
- Recheck Component Installation
- Boot with Essential Hardware
- Listen for Error Beeps or Lights
- Confirm Front Panel Connections
- Check for Shorts
- Test the Power Supply Unit (PSU)
- Reset the BIOS/CMOS
- Inspect the CPU and Socket
- Test RAM Sticks and Slots
- Verify Hardware Compatibility
- Consult a Professional
Start by verifying all power connections, and ensuring that the power supply is properly connected to the motherboard, CPU, and other components. Next, recheck the installation of key parts like the CPU, GPU, and RAM to ensure everything is securely seated.
If the problem persists, try booting the system with only the necessary hardware connected, such as the CPU, one stick of RAM, and the GPU.
See if there are any beeps or lights that can indicate what the problem is. However, there are a few things to look at like all the connectors on the front of the computer, clearing the BIOS, and checking for shorts.
If these steps don’t work, testing the power supply or verifying the compatibility of your hardware might be necessary. Using these troubleshooting hints you can analyze the problem and get your custom gaming PC booted up.
How Can I Fix My PC When I’ve Tried Everything?
If your computer isn’t working no matter what you do, begin by setting the BIOS back to its original settings. Make sure all parts, such as the memory and processor, are correctly in place and check all the cables are connected properly.
Try disconnecting and then reconnecting each cable to make sure they are securely attached. If the problem continues, you might need to install the operating system again.
Still having problems there are some additional steps you can take to troubleshoot the issue.
Double-Check All Connections
- Recheck Power Supply Connections
- Inspect Internal Cables
Clear CMOS/Reset BIOS
- Reset BIOS Settings
- Update BIOS Firmware
Test Components Individually
- Try One Stick of RAM
- Swap Out the GPU
Check for Overheating or Short Circuits
- Inspect for Shorts
- Verify CPU Cooler Installation
Try a Different Power Supply
- Test with a Known Good PSU
Rebuild the System Outside the Case
- Breadboard the System
It could be a good idea to ask a professional computer repair person to figure out what’s wrong.
How To Troubleshoot A Newly Built PC That Will Not POST?
Here’s a step-by-step way to fix a newly built PC that will not POST:
Check Power Supply and Connections
- Verify Power Supply Functionality
- Inspect Power Cables
Inspect Motherboard and Components
- Check for POST Code or Beep Code
- Look for Short Circuits
Test RAM and GPU
- Reseat RAM Sticks
- Reseat the GPU
Reset BIOS/CMOS
- Clear CMOS
Check CPU Installation
- Inspect the CPU
- Verify CPU Cooler Installation
Test with Minimal Components
- Boot with Minimal Setup
Verify Front Panel Connections
- Check Front Panel Connectors
Listen for Diagnostic Beeps
- Attach a Motherboard Speaker
Update BIOS (If Possible)
- Flash BIOS via USB
Test Individual Components
- Test Components in a Different System
- Use Known Good Components
Consult the Motherboard Manual
- Review the Manual for Specifics
Rebuild the PC Outside the Case
- Rebuild on a Non-Conductive Surface
You just need the wires and components to be seated properly and securely. If you hear beeping from the speakers of the computer use those to diagnose the problem. The PSU works, and see if resetting the bios will clear the problem.
If the problem continues, test each component separately to find any faulty hardware. You’ll be closer to finding the solution and having your computer up and running.
How To Maintain And Upgrade Your Custom Gaming PC?
To keep your gaming PC running smoothly and able to handle new games, it’s important to take good care of it. If you find this answer How To Maintain A Custom PC? Here are a few steps to maintain and upgrade your custom gaming PC:
Keep Your PC Clean
- Do Regular Dusting
- Check Fans
Monitor System Temperatures
- Use Monitoring Software
- Maintain Cooling Efficiency
Update Drivers and BIOS Regularly
- GPU Drivers
- Motherboard Drivers and BIOS
Manage Storage Wisely
- Free Up Space
- Upgrade to SSD
Upgrade Components When Necessary
- GPU and CPU Upgrades
- Add More RAM
Maintain Software Health
- Run Antivirus Scans
- Optimize Startup Programs
- Regular Backups
Organize Cables
- Tidy Up Cables
- Consider Sleeved Cables
Check and Upgrade the Power Supply
- Monitor Power Usage
- Upgrade If Necessary
Optimize Performance
- Adjust Settings
- Overclocking
Plan for Future Upgrades
- Stay Informed
- Budgeting
Keeping your personalized gaming computer in good condition is important for the best performance. To maintain your system, regularly remove dust, update the necessary software, and keep an eye on how well each part is working.
When it’s time to improve your PC, focus on areas that slow it down, such as adding a better graphics card, more memory, or a quicker solid-state drive.
Make sure everything will work together and that your power supply is enough before you make any changes. By doing these things, you’ll make sure your PC runs smoothly and can handle the newest games.
Why Won’t My Gaming PC Turn On?
It’s frustrating when your gaming PC refuses to turn on. If you’re experiencing this issue, it could stem from a different problems. Understanding common causes and troubleshooting steps can help you quickly identify and fix the issue, you can get back to gaming in no time.
Check the Power Supply
- Power Supply Switch
- Power Cable
- Test the Power Supply
Inspect the Power Button and Front Panel Connections
- Check the Front Panel Connector
- Bypass the Power Button
Ensure Components are Properly Seated
- Reseat RAM
- Check GPU Connection
- Verify CPU Installation
Check for Short Circuits
- Inspect for Shorts
- Rebuild Outside the Case
Listen for Signs of Power
- Fan Movement or Lights
Test with Minimal Components
- Boot with Minimal Setup
Check for Faulty Components
- Test Components in Another System
- Use Known Good Parts
Inspect the Motherboard for Damage
- Check for Physical Damage
- Consider a Motherboard Replacement
If your gaming computer does not start, you can check the power supply, the front panel connections, and the internal components and most likely find out what the problem is and correct it. Using these troubleshooting hints you will understand why your gaming computer won’t boot up and what you will need to do to fix it.
Why Won’t My New Gaming PC That I Built Do A Post Beep?
It can be frustrating and confusing If your new gaming PC isn’t producing a POST beep, The POST (Power-On Self-Test) beep is a critical indicator that your system is passing initial checks and is about to start booting.
If you’re not hearing this beep, it could signal issues with component connections, power supply, or hardware compatibility. Here’s a guide to help you troubleshoot:

Speaker Connection
Make sure that the case speaker(if you have one) is hooked up to the motherboard correctly. The speaker is usually connected to the “Speaker” or “Front Panel Audio” header on the motherboard.
Power Connections
- All power cables should be securely connected.
Component Seating
- Make sure that the RAM sticks CPU and GPU are all seated properly.
- Don’t forget to check for any bent pins on the CPU or motherboard.
BIOS/CMOS Issues
Clear the CMOS to reset the BIOS settings. This can often resolve issues with new builds. To do this, remove the CMOS battery for a few minutes or use the clear CMOS jumper on the motherboard.
Check for Short Circuits
Verify that there are no short circuits between the motherboard and the case. And just be careful that no standoffs are in the wrong place, or are touching the motherboard where they shouldn’t be.
Inspect Components
Ensure that all components are compatible and properly installed. The system not booting can also be attributed to unsupported RAM or other hardware.
Test With Minimal Configuration
CPU, 1 stick of RAM, and integrated graphics (if it has it). Disconnect all other peripherals and expansion cards.
Motherboard and CPU Compatibility
Make sure the motherboard and CPU are compatible and that the BIOS version supports your CPU.
Listen for Beep Codes
If your motherboard has a built-in speaker or you’ve installed one, listen for beep codes. Refer to the motherboard manual to interpret these codes.
Check for Faulty Components
If possible, test every part separately, preferably with another working system to verify that they work.
If you still don’t get a POST beep after these steps, there might be an issue with the motherboard or another critical component. In such cases, consulting with a professional or reaching out to the motherboard manufacturer’s support might be necessary.
Why Is There No Signal On My Monitor For A New PC Build?
If your custom-built PC displays no signal on the monitor, and your custom PC monitor keeps saying no display, it may point to many imminent issues.
- First of all, check if your monitor is turned on; then check if the input source on your monitor is set properly and that all video cables are securely connected.
- Check that the GPU is seated properly in the PCIe slot and that all necessary power connectors are attached.
- Reinsert the sticks of RAM and ensure they are fully seated. Check for the proper connection of front panel connectors to the motherboard.
- Resetting the CMOS may be necessary to clear any incorrect BIOS settings that cause this problem. If not, then with the minimum components, achieved by removing all non-essential hardware including the RAM one by one and booting, it could fix the problem.
- Check each part in another working system for faults. Ensure parts are compatible with each other. Now, use these problem-solving steps to find out what’s wrong and fix it.
Can I Customize A Prebuilt PC?
Yes, you can customize a prebuilt PC! All users go prebuilt because it’s convenient to build their own. Remember to consider the impact of RAM, storage, and a graphics card on the speed of your computer, especially when running games.
You can also improve performance by using aftermarket air or liquid cooling and adding extra case fans for better airflow.

Cosmetic upgrades like a case with LED lights and good cable management will make your setup look nice. Then update the drivers so everything works properly.
In general, upgrading a prefabricated computer gives you better performance and individuality. If you’re interested in a more hands-on approach, consider learning how to build your own custom gaming PC for complete personalization.
Can You Reset a Custom Built PC?
Yes, you can reset a custom-built PC! A factory reset on your PC can fix some software problems, make the pc run faster, or simply clear out your information to pass it on to another user. Here’s how you can do it:
Resetting Windows
- Go to Settings
- Update & Security
- Reset this PC
Using Recovery Media
- Create a Bootable USB
- Boot from USB
- Install Windows
Clearing BIOS Settings
- Access BIOS
- Load Default Settings
Resetting a custom-built PC is one of the easiest things to do and it clears up many problems. Whether you reset Windows or clear the bios settings, your computer always runs better and is more ready for future use when you do that.
How Long Does A Custom Gaming PC Last?
A good custom gaming computer can easily last 5 to 10 years or more with the right components, usage, and maintenance. But, with consistent upkeep and the casual replacement part, you can keep your gaming rig running as smoothly as possible for as many years as possible. Here are the main things that affect how long it lasts:
- Component Quality
- Usage Patterns
- Upgradability
- Cooling and Maintenance
- Technological Advancements
The life span of a custom-built gaming pc depends on so many factors, including the quality of parts, usage, and maintenance. A nice well-built custom gaming pc can easily last an average of 5 to 10 years plus.
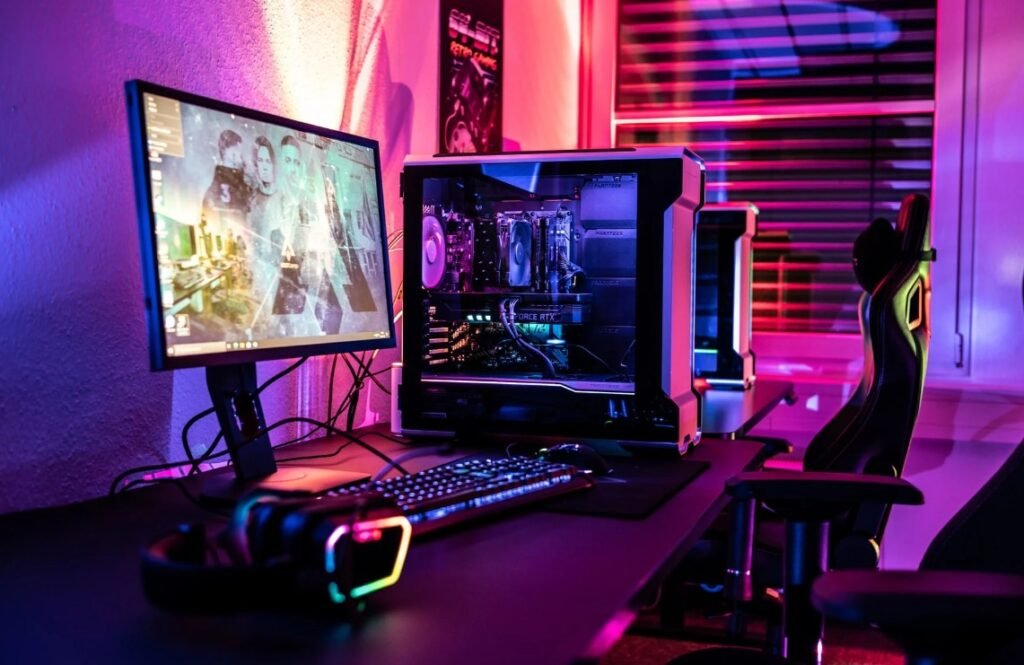
How To Set Up Your New Pre-Built Gaming PC?
It is important to properly set up your new prebuilt gaming computer to check the best performance and minimal lag during gameplay.

Important Points
- Ensure proper ventilation for the PC to avoid overheating.
- Install the latest drivers for all components to ensure compatibility and performance.
- Adjust display settings to match your monitor’s capabilities.
- Test your system with games or benchmarks to verify performance.
Well, first take your PC box and look for damages. So put the PC in a place with good ventilation, because airflow is important for performance. Then, connect your monitor using the correct HDMI or Display Port cable, with your keyboard and mouse, and so on.
Plug in the power cord flip the PSU switch and hit the power button to boot up your system. The first boot should take you into the BIOS to check that all the hardware is recognized.
Click through the screens accepting all the defaults and install your operating system then catch up to the internet and download all the important updates.
Installing the latest drivers for your graphics card and other components is crucial for peak performance. Therefore, set your screen resolution and energy-saving plans for optimal gaming, and then try, try, try to make sure everything works.
Can A Custom-Built PC Be Continually Upgraded To Keep Up, Or Will It Have To Be Replaced Eventually?
A custom-built PC is upgradeable over time simply by swapping out or adding more RAM, GPU, or storage. But after a while upgrades start to cost too much, and it is cheaper to just replace the item. However, there are some considerations to keep in mind:
Upgradability Over Time
- Modular Components: Almost all the parts (GPU, RAM, hard drives even the CPU depending on the motherboard) can be upgraded individually. This allows you to upgrade performance without overhauling the entire system.
- Motherboard and CPU Compatibility: CPU architectures and technologies may require a new motherboard. However, swapping out the CPU could very well lead to swapping out the motherboard which is a MUCH more extensive overhaul.
- Power Supply: As soon as you begin to upgrade components, specifically the GPU, you will eventually be forced to upgrade the PSU to accommodate the greater power demands.
- Ports and Slots: As technology evolves, new standards (like PCIe 5.0 or DDR5 RAM) emerge. Older motherboards might not support these, limiting upgradability.
Eventual Replacement
- Technology Shifts: Significant technological shifts, such as new CPU socket types, faster RAM standards, or advanced GPU interfaces, may eventually necessitate a complete system replacement if your current build can’t accommodate these new advancements.
- Aging Components: After a while, the case or even cooling solutions become outdated or unable to hold the newer, more powerful parts.
- Diminishing Returns: After many years, replacing single parts would start to yield smaller and smaller benefits, because the rest of the system would just slow it down.
A custom-built PC is upgradeable over time, which means you can upgrade it as new stuff comes out, and thus make it last a whole lot longer. But after a while–usually after a few years–it becomes cheaper and easier to just replace the whole system instead of individual parts.
What To Do After Building A Gaming PC?
After building a gaming PC, first, double-check all connections to ensure components are secure. Turn on the PC, go into the BIOS, and check out component detection, and boot order.
The OS, then the drivers (the latest ones, of course, after downloading them). So, update OS with all the latest patches, tweak the BIOS settings for maximum performance, and stress test the living crap out of that sucker to make sure it’s rock solid and stable. Back up that system, load your games, baby, and play on your tuned gaming box.
What Do Gaming PC Builders Usually Do After Installing The OS?
When constructing a gaming PC, once the operating system is installed, the next step is to update the drivers for the GPU, motherboard, and peripherals so that they are at their peak performance. And then perform Windows Update to install the newest security patches and updates.
Then they have to get the necessary software, web browser, antivirus, and Steam for games. Builders also set up system settings, adjusting the display resolution and power plan to “High Performance.”. They might do a system restore to protect the new setup.
After this they place games on the fastest drive and organize storage, then they run stress tests to check system stability and keep tabs on performance metrics.
Then they install games, tweak the game settings to get the optimal compromise between performance and graphics, and if they are so inclined, overclock the system for extra performance, and then they play.
Custom Built PC Repairs
Custom-built PC repair is the process of identifying and then resolving a hardware or software problem unique only to your custom configuration.
- Diagnose Issues
- Replace Faulty Parts
- Reinstall OS
The normal-looking kind of repair, bad motherboard or GPU or RAM, or possibly a softer issue like driver conflicts or os corruption.
That’s not all repairs that could mean upgrading parts to make it run faster or to repair cooling problems so that the computer doesn’t melt down.
That could also be in the form of just general up keep, such as processing the dust out of part and applying new thermal paste. Custom-built PC’s are fixable, the key is proper diagnosis, so your system is just as smooth.
Rebuilding Old Gaming PC Which Parts To Replace First
Rebuilding an old gaming PC can breathe new life into your system and enhance your gaming experience. You don’t need an entire condition to have a performance improvement, just some important upgrading of parts that are:
- Graphics Card (GPU)
- Processor (CPU)
- RAM
- Storage
- Power Supply (PSU)
- Motherboard
- Cooling System:

After some upgrades, your newly renovated gaming rig will be able to play modern games and do so well.
Newly Built PC Doesnt Turn On Or Do Anything
It can be frustrating if your newly built PC doesn’t turn on or show any signs of life. However, several common issues can prevent startup:
- Check Power Supply
- Inspect Connections
- Test with Minimal Components
- Check for Short Circuits
- Listen for Beeps
- Try a Different Power Outlet
- Inspect the Motherboard
If none of these steps resolve the issue, the problem may be related to faulty hardware, and further diagnosis or replacement of components may be necessary.
Windows 10 Install On New Custom Built PC Not Working
Troubleshooting tips for those experiencing difficulties installing Windows 10 on a newly built custom PC:
- Check Installation Media
- Verify BIOS Settings.
- Check Hardware Connection
- Test RAM Configuration
- Disconnect Unnecessary Peripherals
- Use UEFI or Legacy Mode
- Check for Hardware Compatibility
Otherwise, test parts one at a time or bring them to a repair technician to see if it is a hardware-related problem.
Conclusion
To conclude, there is the issue of a custom gaming pc which also needs to be troubleshot and maintained and requires a certain amount of attention to detail, and constant care.
Whether it is establishing the proper contacts or swapping parts, it is all a part of maintaining a healthy pc lifestyle. With appropriate upkeep and upgrades at the right time, your gaming rig will continue to run at peak performance for years to come.
People Also Ask
How can I tell if my power supply is faulty?
If your PC isn’t turning on, try using a different power supply or testing your current one with a power supply tester. A faulty PSU might show no signs of life, emit unusual noises, or fail to power other devices.
What should I do if my gaming PC overheats?
Ensure your PC has proper airflow by cleaning dust from fans and filters, upgrading your cooling system, and using thermal paste on the CPU. Overheating can lead to shutdowns and performance issues.
Can a gaming PC run without a dedicated GPU?
Yes, but only if your CPU has integrated graphics. However, performance will be significantly lower compared to using a dedicated GPU, especially for gaming.
How do I know if my RAM is faulty?
Use memory diagnostic tools like MemTest86 to check for errors. Symptoms of faulty RAM include frequent crashes, slow performance, or failure to boot.
Why is my gaming PC making a clicking noise?
Clicking noises often indicate a failing hard drive or a fan issue. Backup your data immediately and inspect your PC to identify the source of the noise.


